Web API Deployment
The MIKE OPERATIONS Web API is an ASP.NET Core application that can be deployed and hosted in different ways. Out of the box, the MO Web API consists of a self-hosted console app (exe-file) using the Kestrel web server. In a simple setup, this exe-file could be hosted within a standard Windows Service. However, in most production scenarios, you would configure it with a reverse proxy server such as Internet Information Services (IIS), host it within an Azure App Service, or host it as a Docker container.
IIS Reverse Proxy Server
When hosting the MO Web API on a local server (localhost), using a reverse proxy server, such as IIS, will usually be your best option. This is the default deployment option for the MO Web API.
These instructions assume you already have MIKE OPERATIONS and PostgreSQL installed on the server, with a MIKE OPERATIONS database set up in PostgreSQL. You must also have admin rights on the machine you are configuring.
1. Install IIS components
IIS must be set up with certain components to work with the MO Web API. Several OS are supported:
- Windows Server 2022: step by step
- Windows 11: step by step
In both cases, make sure to enable the following components:
- .NET Framwork 4.8 Advanced Services
- ASP.NET 4.8
- Internet Infromation Services
- Web Management tools
- ISS Management console
- World Wide Web Services
- .NET Extensibility 4.8
- ASP.NET 4.8
2. Install MIKE OPERATIONS Web API
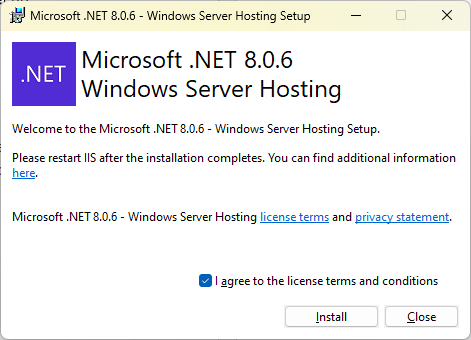
Run the MIKE OPERATIONS WebAPIs installer. This is a standard install wizard. You may be asked to install the Microsoft .NET Windows Server Hosting components. Click the “I agree… check box and install).
3. Configure IIS
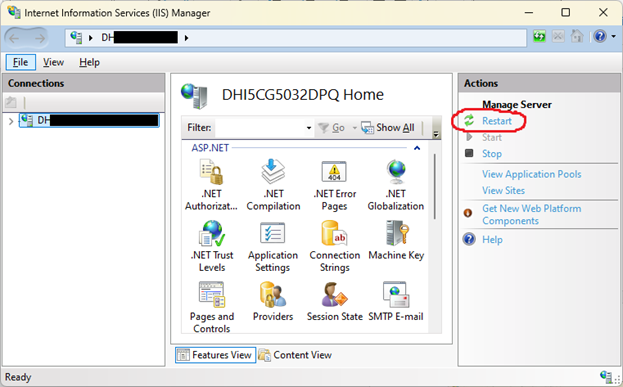
Open the Internet Information System (IIS) Manager from the Start Menu (search for “IIS”), and restart the service to complete the installation:
4. Configure Web API suite
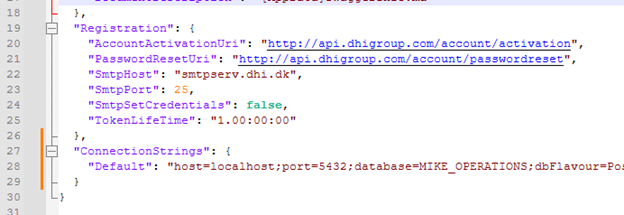
You need to specify which MIKE OPERATIONS database you want to use for the Web API. Edit the following file in a text editor (e.g. Notepad):
C:\inetpub\wwwroot\mikeoperations\webapi\appsettings.json
Add the following text to the file, inside the root brackets, replacing the highlighted sections as appropriate to point to your MIKE OPERATIONS database. (You can use the default user name and password below, if they haven’t been changed in MIKE OPERATIONS.) Also, make sure to include a comma between sections.
,
"ConnectionStrings": {
"Default": "host=localhost;port=5432;database=MIKE_OPERATIONS;dbFlavour=PostgreSQL;workspace=workspace1;username=dss_admin;password=secretdss_admin;runtimeconfig="
}
It should look like the following:
Reopen IIS Manager, and make sure the “Mike Operations Api Website” site is present and running (“Start” should be grayed out). Then, click on the “Browse” link to view the Swagger interface for the Web API. (You may want to note the port used for future reference.)

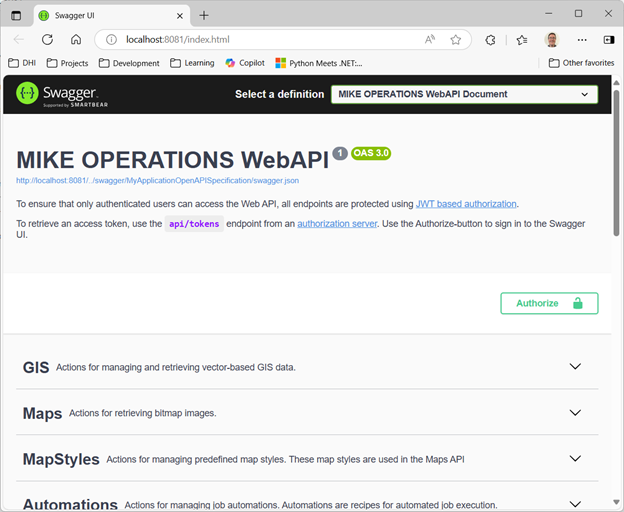
5. Test Swagger
After clicking “Browse” you should see:
6. Test authentication
The next step is to test the Swagger interface to make sure your connection to the database is working.
On the Swagger page, expand the Authentication service group and then the “POST /api/tokens” endpoint:

Click “Try it out” on the right, and modify the validation DTO as follows:
{
"id": "admin",
"password": "secretadmin",
}
Note
This id and password are fixed in the current release. A mechanism to change the password will be added in a future release. The account is stored in the following file, but the password is encrypted, so it can’t be changed. C:\inetpub\wwwroot\mikeoperations\webapi\App_Data\accounts.json
Tip
If you have the MIKE OPERATIONS Web interface (a separate product), you can create and change accounts in that application and then copy the accounts.json file to the Web API site at the path above.
Click “Execute”
You should get a response similar to:
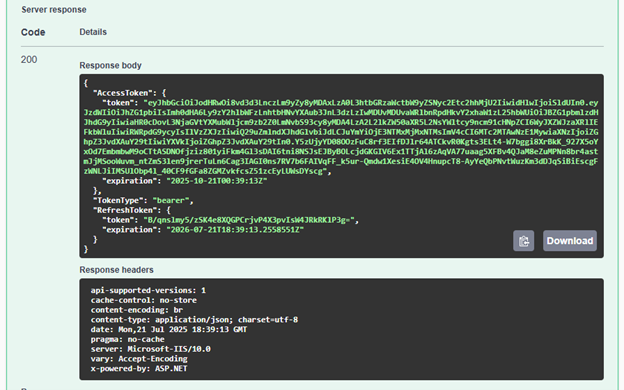
The authorization token you will need is the long string of characters between the quotes (do not include the quotes). In this case it is everything from eyJhbGc… through to …LUWsDYscg. (A different token is generated each time.)
Copy the token and go to the top of the page and click “Authorize”
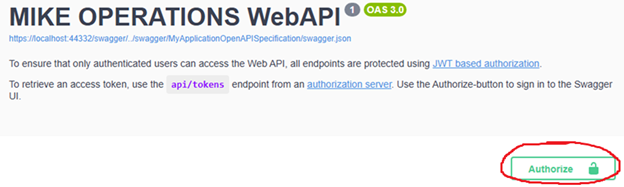
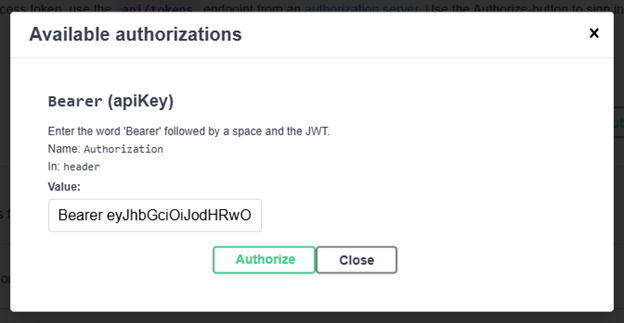
Type in the word “Bearer”, add a space, and paste the token, then click “Authorize”. This will allow you to use the Swagger UI to test out the various API endpoints presented.
Note
To execute these requests yourself, you’ll need to include the authorization token in your header as shown in the CURL statement on the Swagger page when you use “Try it out”.
7. Test end points
For most of the endpoints you will need a “connectionId”. This connection ID depends on the service group you are using. They are as follows:
| Service | ConnectionId |
|---|---|
| GIS, Maps | mc-gis |
| TimeSeries, TimeSeriesAnalysis | mc-timeseries |
| Spreadsheets | mc-spreadsheets |
| Jobs, JobHealth | mc-jobs |
| Tasks | mc-tasks |
| Models | mc-models |
| Scenarios | mc-scenarios |
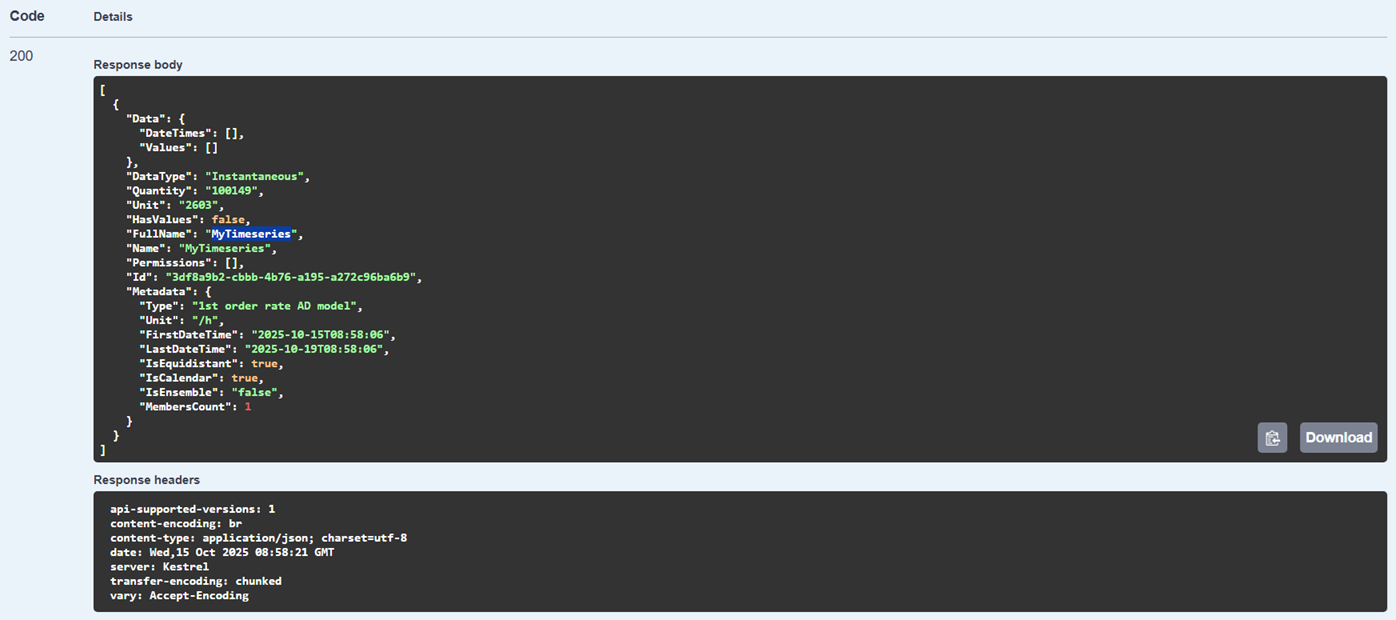
For example, go to the Timeseries end point
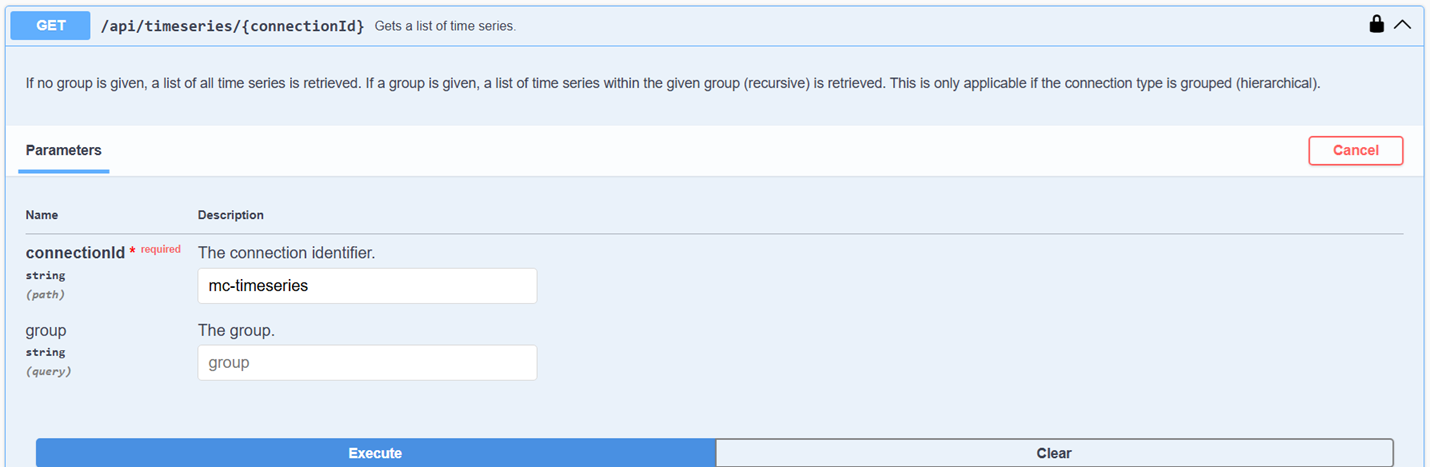
And you will see the timeserie(s) in your database:
Azure App Service
(coming Autumn 2025)